Thursday, 2 January 2014

Dream Big Little One, The World is Yours - a Travel Inspired Baby Shower


In late 2013, I had the pleasure of hosting a baby shower for my dear friend, Millie, with my wonderfully talented co-pilot, Anastasia.

Very early on we decided on a travel theme because Millie loves travelling! Seriously, she has been to more places than I can name! And while it was a bit of a running joke that the shower might actually be reminding her that travel will never be the same for her ever again (!), once that theme was locked in, ideas for the rest of the party came flying in thick and fast.

Just a warning before we go any further. There will be a number of airplane puns in this post. I'm not apologising!


So, to get this party off the ground (I warned you!), we sent out boarding pass invitations. Everyone was allocated an individual seat number and given strict instructions to bring their boarding passes with them to the party. And all our travellers were surprised when we actually asked for their presentation on arrival!

There was a reason - at our Check In desk, we tore off the end of each boarding pass like they do at the airlines and put them into a box. We then drew them out randomly to award seat upgrades at the party by giving out actual airline comfort packs! I swear, the girl selling those things on eBay must have thought it was her lucky day when we came along and bought every one she had!!


There were also a few worried looks when our guests noticed that we had a set of scales on the Check In table too. That was for another game at the party, where we gave out more prizes for the heaviest and lightest hand luggage. This was one party where it really paid off to carry a big, heavy handbag. I would have won hands down if the crew were allowed to participate - and I wouldn't even have had to rig it!


So, with everyone checked in and seated - yes, the party chairs were numbered! - it was time for a beverage and snack service from our special cart, served by our very own gorgeous trolley dolly, Spiroula.


And this was followed by a meal service, which we made as authentic as possible by providing everyone with a tray and serving a selection of hot food - with a choice of beef or chicken of course! Actually, beef lasagna, chicken curry and vegetarian stir fry noodles.  These were served in foil trays like on a real plane, together with little cups of salad. Seriously, the only way we could have made it more like being on a plane was if we had made the food cold and smell a bit dodgy! Thankfully it wasn't worth being that true to life!


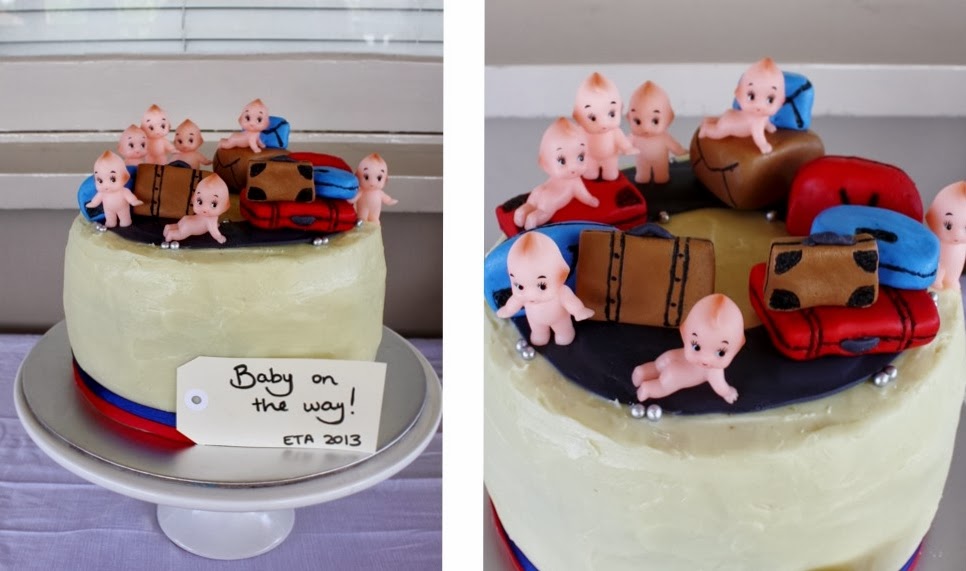
With our final destination in sight, Millie cut her cake and we served some international inspired desserts - New York Cheesecake, Tiramisu and Fruit Salad. We weren't actually sure where fruit salad comes from, but we allocated it to Australia. Hey, the fruit was probably grown here!



We also gifted Millie with this lovely framed print from Sweet Sienna Prints on Etsy, which doubled as a background for the party. I love doing this, I think these are really special gifts and a great keepsake of the day. Sarah at Sweet Sienna is also so helpful with sizing and customising, I can't recommend her lovely little shop enough.


After all this, the only thing left to do was land this party plane and hope our guests had a pleasant flight, but not before directing everyone to visit our baggage claim and pick up these gorgeous suitcase favour boxes from Piggy Bank Parties on Etsy. They are great - so easy to print and make up, and everyone loved that they were personalised too! We filled them with Hershey's kisses and Reese's Peanut Butter Cups from the USA. Because, who goes travelling and doesn't bring home such things?!


Find these great suitcase printables, together with lots more at Piggy Bank Parties

 
Finally, I have to say that this party was an absolute pleasure to organise for so many reasons. My co-pilot and I had so many laughs as we thought of more and more hilarious ways to incorporate the theme - I'm blaming the altitude! - which were really well received by everyone who attended. And obviously Millie deserves a great send off to motherhood like this. 
 
So, with that all said, I'll turn this P11 aircraft around and head off to the next party destination. Flight attendants please arm the doors for take off!


Wednesday, 1 January 2014

A New Years Present Just for You - Salted Caramel Cheesecake


Happy 2014 everybody! Wishing you many wonderful surprises during the year ahead.

I thought I'd kick off the new year with a blog post. Good start, right? I know I haven't shared anything for a while but I'm so thankful to say that it's because I've been unbelievably busy with lots of happy family occasions. And they've given me lots of things to share on the blog, starting with this beauty.


It's a tradition of mine to make a Cheesecake for Christmas Eve. Not only because it's my all time favourite type of cake and I deserve my favourite if I'm baking at Christmas, but because I think it goes really well with the seafood and salad Christmas Eve dinner we also have as a tradition at P11 HQ. And yes, we still do the turkey, ham and pudding thing on Christmas Day - thus the lack of recent blog posts!

I was trying to come up with something a little bit different for this year when like the angel she is, my wonderful friend Ruth gave me a Donna Hay recipe for Salted Caramel and Vanilla Baked Cheesecake she had been holding onto for a while, but hadn't gotten around to making. She's truly a girl after my own heart - I love salted caramel. And I have millions of recipes I've been holding onto for years!!!

My stash of recipes-to-try!

With the intention of making the Donna Hay recipe I had been gifted, I went off the day before Christmas Eve to do the grocery shopping. And as soon as I got into the carpark, I realised I'd forgotten to bring it with me. You guessed that was going to happen didn't you?!

Well, there was no way I was going to give up my prize parking spot or make another trip to the second storey of hell that is a supermarket so close to Christmas, so I just had to guess and buy all the things that are usually in a cheesecake.

Of course, they were all wrong.

My xmas pressie! Also here: http://www.donnahay.com.au/recipes/salted-caramel-and-vanilla-baked-cheesecake

But I'm ecstatic to say that all was well anyway. I improvised with some tried and true shortcuts and it was good. Fabulously, mouth-wateringly good, in fact.

So, enjoy my new year's gift and make this as soon as possible. And don't think of it as breaking any healthy eating resolutions, think of it as achieving your resolution to do more things just for you!!


Salted Caramel Cheesecake

While this cheesecake looks impressive, it's incredibly easy to make. It needs refrigerating to set though, so make it one day ahead.


Ingredients

Cheesecake
250g Arrowroot or other plain biscuits
125g melted butter
500g caramel sweets (such as Pascalls Columbines)
1/4 cup thickened cream
1/4 teaspoon table salt
750g cream cheese, at room temperature
1 cup caster sugar
3 eggs, at room temperature

Topping
1 cup thickened cream
1 cup sour cream
1 tablespoon icing sugar
1 teaspoon vanilla extract
Sea salt flakes for decoration (optional)

Instructions

1. To make the base of the cheesecake, process or crush biscuits into crumbs, then add melted butter and mix through. Press mixture over base and sides of a lightly greased 22 cm springform tin. This will give you a thick crust, which I love, but you can use a larger tin and make it thinner if that's what you've got. Refrigerate prepared crust for at least 30 minutes while you prepare the caramel and filling.

2. To make the caramel, place shop-bought caramels and cream in a saucepan on medium heat. The caramels will melt as you stir them through the cream. Add salt and set aside to cool slightly but not harden. Feel free to add more salt at this stage to your taste - I did!

3. Preheat oven to 160C / 325F.

3. To make the filling, beat cream cheese and sugar with an electric mixture (on medium to high speed) until combined. Add eggs one at a time and keep beating after each one is added. Add half of the caramel mixture and beat well to combine, then reduce speed of the mixer and beat until mixture is smooth.

Just a quick note here - if the caramel is too hot when added to the filling, it may seize up slightly. Don't worry, it will combine with the filling when mixed at high speed, and any missed parts will form streaks of caramel in the cheesecake, which is never a bad thing!

4. Pour filling into prepared base and bake for 1 and 1/4 hours. The filling should be firm on the outside but still "wobbly" in the middle if you lightly shake it. When ready, turn off the oven and leave for 10 minutes. Then, refrigerate for 3 hours.

5. Place all of the ingredients for the topping in a large bowl and beat or whisk until soft peaks form. Remove the cheesecake from the fridge and the tin, and smooth topping over it. Then drizzle over the remaining caramel sauce. Refrigerate until ready to serve.

Wednesday, 20 November 2013

Tempting Fate: A Thing 1 and Thing 2 Baby Shower


I may have mentioned that our Party of 11 will soon become a Party of 13 because my sister's twins will be arriving any week now. And the arrival of twins means only one thing around here - a big fancy baby shower! Well, it will mean more than that for my sister when they arrive I'm sure, but for now it means a party.

Early on, my sister and brother-in-law decided that the sex of the new babies would be a surprise, and that they would be welcomed to the world with a Thing One and Thing Two baby shower. (Never mind that they will actually be Thing Three and Thing Four!) So, we started off by buying every red and light blue party decoration we could find. As you can see, there were a few available.


Some way into this shopping frenzy, I realised that I knew nothing about Thing One and Thing Two. I mean, I knew that they were two blue-haired little creatures in a Dr Seuss book, but nothing else. So I decided to be a good party planner/Aunty, and do some research by watching Mike Myers' The Cat in the Hat.
 
That movie is bloody hilarious. But what I found more hilarious was that my sister had chosen to base her baby twins' shower on two little buggers that jump out of a box and absolutely wreck the house. I'm pretty sure that's the definition of tempting fate! (And I'm leaving any joke about little people coming out of a box absolutely alone!)


So with that good laugh out of the way, it was time for some serious party crafting. Now you might have seen this Nautical Baby Shower that my sister styled for her sister in law's baby shower alittle while ago? Well, it seems party decorating is her forte, because she did a great job making so many bits and pieces for her party. And before you get into me about making her do stuff for her own party - she wanted to, starting with these entryway decorations.

Now I don't know about you, but I have a morbid fear of walking into the wrong house when I'm invited to a party at a place I've never been to before. I mean, so many parties are held in the backyard or it's too loud inside, so after knocking for like 15 minutes, you have to just walk in and hope for the best! So I'm hereby introducing a mandatory door decoration rule on P11. And they have to be as fab as these!


Another P11 rule I had reinforced to me while planning this party, is this. When a lady with two babies inside her wants every type of party food ever invented and a lolly buffet and a massive Red Velvet Cake at her shower, you just make that happen!


So we made more than 15 (yes, 10 plus 5) different party foods happen, including this cake which I absolutely love (and if you've been playing along at home, you know I never say that).

However, it seems that I broke my own rule as far as the cake is concerned. Because my sister insists that the day before the party we had a conversation and we decided/I was instructed to make a cake that looked nothing like this and I was warned against those whirly straws. That could very well be true - I'm fairly sure I was lost in a red and light blue haze by then! Thankfully she loved it, but that was too close a call - I really need to start writing this stuff down. Or listening.


So, with the shower done and dusted, all that remains is for Thing One and Thing Two to join our Party of 11. Or Party of 13. Well now, isn't that going to get confusing! I'll also be curious to see whether they really turn out to be two little creatures who jump out of a box (still saying nothing about boxes!) and wreck the joint. I'll keep you posted!


Tuesday, 19 November 2013

Passiona Spider Cake (or Passionfruit Icecream Soda Cake)


Oh dear. It's another post, another apology around here! But I'm about to make up for not posting for a while, starting with this super easy icecream cake. Then I'm going to bombard you with baby shower ideas, so hang on for the ride! You don't know this yet, but that's funny because one of the parties is a plane theme.

So, I discover the oddest-slash-funniest things doing this blog and I've got a great example this week, but first let me give you a bit of background. See, this is a Passiona Spider cake. The problem is, to many of our international visitors (love you all, particularly you Guatemalans that check in from time to time!), that will make absolutely no sense.


A Spider in Australia is not only an evil being that appears menacingly close to your head while you're driving on the freeway (yes, that happened recently!), it's also a glass of soft drink (or soda) with a scoop or two of ice cream dropped into it. So it all fizzes and eventually melts together to create a fruity, creamy, delicious concoction.

According to Wikipedia, that translates to an Ice cream Soda in the USA and a Snowball in the UK and New Zealand. By the way, that makes sense, a snowball. Can anyone explain to me what this drink has to do with creepy, crawly spiders?!

And, what I also discovered is that a person who made ice cream sodas in the original American drugstores was called a Soda Jerk?! That's just mean. Funny, but mean.


Well, what a massive jerk I've turned out to be this week, because I took that spider idea and turned it into a cake. A passionfruit flavoured one, made from that great 80's Aussie staple, Passiona!

And to really rub it in, this cake has three ingredients. I'm not kidding! So, whatever we call it, we have to agree this is an ideal summer cake. Which probably makes me less of a jerk, but a jerk nonetheless!

Passiona Spider Cake


This cake is passionfruit flavoured, with a vanilla ice cream centre. Piled on top are scoops of the Passiona and ice cream, which was mixed together and frozen and came out like a cross between ice cream and sorbet. Substitute with proper passionfruit ice cream if you prefer. If you fancy another flavor of spider, try it and let me know how it goes. I was tempted myself to go with pineapple or orange soft drink.
 

Ingredients

2 vanilla cake mixes
1 litre Passiona or passionfruit flavoured soft drink
2 litres vanilla ice cream

Instructions

1. Preheat oven according to cake mixes you are using and grease and line a deep 19cm round spring form cake tin.

2. Place cake mixes in a large bowl, then add 600ml of soft drink. Whisk quickly until mixture is combined well and any lumps have disappeared.

3. Transfer cake mixture to prepared cake tin and bake according to the cake mixes you are using, or until a skewer comes out clean.

4. When the cake is baked and cooled completely, split it horizontally into two even layers. Line spring form tin again and place one layer of the cake back into the bottom.

5. Remove ice cream from the freezer and defrost it until it resembles a thick, spreadable consistency. Spread half of the ice cream over the first cake layer and cover tin with clingfilm. Place back into the freezer and freeze until ice cream has set again, at least 2 hours.

6. In the meantime, place 400ml of soft drink into a small saucepan and boil until reduced by half. Then, stir the syrup through the remaining melted ice cream, pour into a glass bowl or plastic container and freeze until set, at least 2 hours.

7. When both have set, remove cake from the freezer and place the second layer of cake on top. Place back into the freezer until ready to serve.

8. When ready to serve, remove cake from the cake tin and scoop the ice cream mixture on top.

Tuesday, 8 October 2013

I Need Max's Homemade Cupcakes!


Wow guys! I can't believe it's been so long since I posted. And sadly, I have no excuse. Well, I could say I was busy with uni and family stuff and blah, blah, blah. But once we get into this post, you'll probably see straight through that.

See, the US ratings period has started and all the good shows are back. Including some that I haven't watched before but wanted to. So you just know that I've had (yes, had) to catch up, some with whole seasons in one go. This isn't a new thing for me though. I often prefer to watch all of the episodes of a TV show together. I'm too impatient to wait week-to-week!

Where it gets weird - and I'm totally hoping that someone else is with me on this! - is that I often get so into a show that I feel like it's really my life. And I feel totally empty when I get to the end of the season. So I really feel like I've lived above MacLaren's Pub, cooked blue ice in the desert, hung out at all the cool places in LA with Vinny and the gang, and played football for Dillon Panthers (and had a huge crush on Coach Taylor!!).


But recently I've been spending a huge amount of time at Brooklyn Diner and trying to make ends meet with my financially-challenged friends, Caroline and Max. And Sophie and Oleg and Earl and the adorable Han. I'm of course talking about 2 Broke Girls, which took me a long time to get into, but which I'm so in love with now.

And this being a party blog you know I'm eventually going to get to the cupcakes! Oh, how I could go a couple of Max's Homemade Cupcakes when it's late at night and I'm watching a couple of episodes. Especially when they're all laid out on the counter, in a huge selection, all perfectly baked and iced. And because we all love Max, we know they must all taste amazing!


So, with all this going on, you can imagine that I just had to make some. Not only for my midnight cravings, but because I got to thinking what a great gift a selection of different tasting cupcakes is. They not only look great but basically you're giving someone permission to eat multiple cupcakes - and that's never a bad thing!

But, as we all know I'm not a fan of making anything that's too much bother. So the good news is a cupcake selection is super easy and can be made with whatever you have lurking in the fridge or the pantry. And those bakery boxes are available in pretty much every dollar shop in the world for little or nothing.

 
Not these boxes you see in the pictures though. These are from Williams Sonoma in Bondi Junction. I know, fancy. But I'm absolutely true to my word in terms of the cupcakes. They are 100% made from stuff I already had at home. I started with a basic vanilla cupcake mix and added some drinking chocolate to half of the mixture to make chocolate and vanilla cakes. Then, I made a simple buttercream, divided it into four and added mint essence, peanut butter, strawberry jam and coconut. And voila, a selection of four different cupcakes from little or nothing.

Now, I totally intended to get out all the piping stuff to ice these cupcakes and make them look all bakery-like. But when the time came I couldn't be bothered. Oh alright, the truth is I still had so many episodes of 2 Broke Girls to watch! Mind you, if you give these to someone and they tell you you should have piped the icing on, you have my permission to punch them!

Four Way Cupcakes (aka Max's Homemade Cupcakes)

This recipe makes 24 cupcakes in four flavours - chocolate & peanut butter, choc-mint, coconut and strawberry. And yes, Four Way Cupcakes is a play on Max's potty mouth!


Ingredients

Cake mix for 24 vanilla cupcakes (I used Magnolia Bakery's recipe, which you can find here)
3/4 cup drinking chocolate or good cocoa
Vanilla buttercream icing for 24 cupcakes (I used Magnolia Bakery's recipe, which you can find here)
1 tablespoon peanut butter, preferably crunchy
1/4 cup dessicated coconut
2 tablespoons strawberry jam
1-2 drops peppermint essence
1-2 drops green food colouring

Instructions

1. Preheat oven as required for the cake mix you are using and prepare tins for 24 cupcakes.

2. Make cake mix for 24 vanilla cupcakes, then divide into 2 bowls. Set aside one bowl of vanilla cake mix.

3. In the other bowl, add sifted drinking chocolate or cocoa and stir well.

4. Divide mixtures into pans (12 of each flavour) and bake as per cake mix instructions.

5. In the meantime, make the vanilla buttercream icing as per the instructions above or the one you are using. Divide into four bowls.

6. In the first bowl, stir in peanut butter. In the second bowl, stir in strawberry jam. In the third bowl, stir in coconut. In the fourth bowl, stir in peppermint essence and green food colouring. (You will need to taste each and use your judgment as to consistency here. If icing becomes too thick, add a splash of milk. If icing becomes too thin, add more icing sugar. Always add additional ingredients in small portions!)

7. When cupcakes are baked and completely cooled, add peanut butter icing to 6 chocolate cupcakes and mint icing to 6 chocolate cupcakes. Then add strawberry icing to 6 vanilla cupcakes and coconut icing to 6 vanilla cupcakes.

Thursday, 19 September 2013

More Pink Party Dots - The Food!


Well, I hope you enjoyed the Neon Pink Party Table post here and picked up a few tricks and ideas. I also hope I didn't come across as being too mad for throwing the party just because. Although, thinking about it now, what better reason is there?!

So, let's keep the pink madness going and talk about the food. Pink polka dot food to be exact!


When I'm throwing a party just because, or have a limited budget or timeframe for so many other reasons, I like to follow what I call The Highlander Rule - There can be only one. One showstopper to spend my time and money on, that is. 

In this case, it was a real raspberry mud cake with coconut ganache and handmade giant chocolate buttons. Sound good? It was! And the recipe and instructions are below.


And since I never do anything by halves, and in the real world there might be someone who fancies something other than cake, I wanted two other quick sweets to finish off my table. Pink polka dot sweets to be exact.

The first were some vanilla iced brownie dots, made by simply  baking a tray of the best brownies ever, icing it with some ready made vanilla icing, cutting out circles with a round cookie cutter and covering them with pink and white sprinkles.


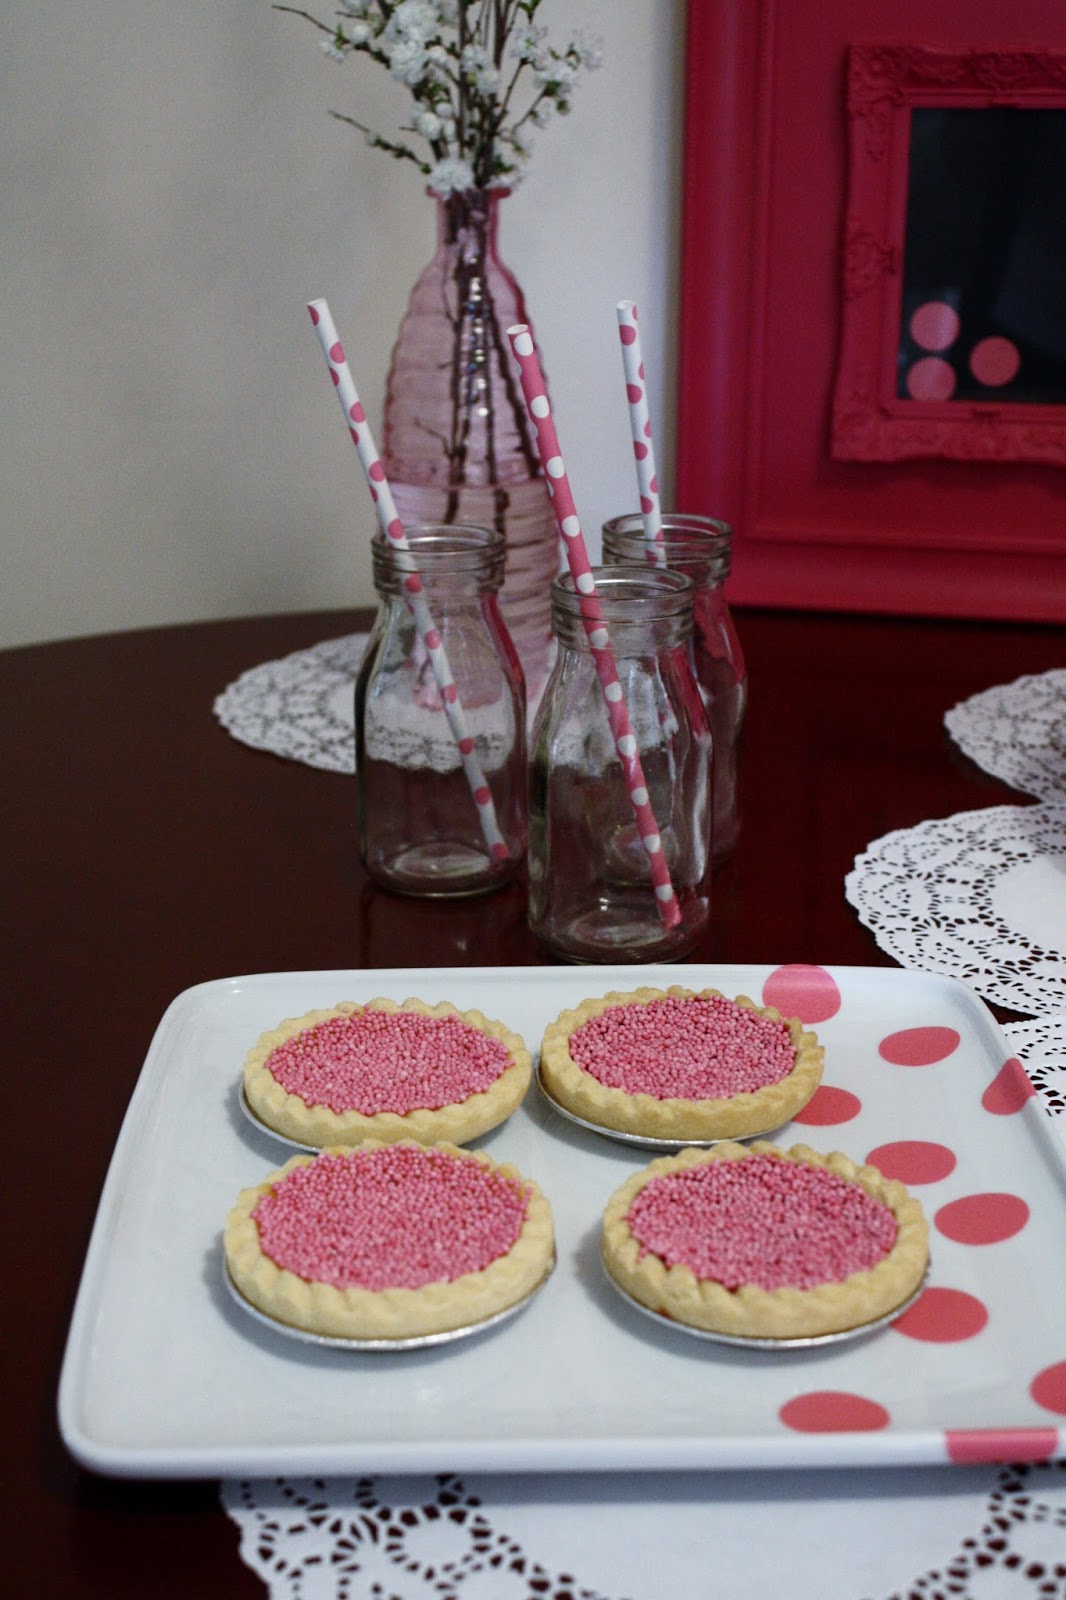
And even easier, I made some sprinkle tarts by buying ready made raspberry and lemon ones from the supermarket and covering them in pink sprinkles. You want budget? I've seen those tarts at Woolies for $3 for two packs of six. A box of sprinkles is $2. That's $5 for a quick sweet for my Party of 11. And I think they look great. If I do say so myself!


So I did it. Pink polka dot food for the neon pink polka dot party table. And all before I sent myself dotty as well!


Real Raspberry Mud Cake with Coconut Ganache


This recipe makes two shallow 20cm cakes for stacking, and enough ganache to cover the whole thing. The raspberry and coconut flavours are subtle, so if you want a bigger hit, spread the bottom cake with raspberry jam and dessicated coconut before adding the top cake.


Ingredients


Cake
230g unsalted butter
200g white eating chocolate
2 2/3 cups caster sugar
1 1/3 cup milk
2 cups plain flour, sifted
2/3 cup self raising flour, sifted
1 teaspoon vanilla extract
2 eggs
2 cups raspberries, mashed (or use 1 cup raspberry puree if you have it, or prefer to remove the seeds)

Ganache
440g (2 blocks) white eating chocolate
3/4 cup coconut cream

Giant Chocolate Buttons for Decoration
150g white eating chocolate
food colouring
sprinkles


Instructions


Cake
  1. Preheat the oven to 160 degrees Celsius and line two 20cm baking tins with greaseproof paper.
  2. Place butter, white chocolate, sugar, and milk in a saucepan and stir to combine over low heat. Then remove from heat and allow to cool.
  3. Mash raspberries until smooth (or push through a sieve if you want to remove the seeds). 
  4. Once the chocolate mixture is cooled, whisk in flours, vanilla extract and eggs. Stir in raspberries.
  5. Half mixture between the two tins and bake for 1 1/4 hours, or until a skewer comes out clean.
  6. Once baked, remove and cool completely before spreading with ganache.

Ganache
  1. Break chocolate into small pieces and place into a bowl.
  2. Place coconut cream in a microwave safe jug or bowl, and microwave for approximately 2 1/2 minutes until it starts to boil.
  3. Immediately pour boiling cream over the chocolate and leave for 1 minute. Then, stir mixture until combined. (If all of the chocolate fails to melt, place the whole mixture into the microwave for 30 seconds at a time. Check and stir until combined)
  4. Once combined, place ganache into the fridge until it reaches a spreadable texture.
  5. When the cakes are cooled, even the tops off them and place one on a cake stand or plate, upside down so that the smooth side faces up.
  6. Spread with ganache over the top and place it into the fridge until ganache hardens slightly.
  7. Then, remove from the fridge, place the second cake on top and spread the remaining ganache over the whole of the cake.

Decoration
  1. Trace circles of the required size onto baking paper. Turn the paper over and lie it flat on a tray.
  2. Melt the chocolate and place it into an icing bag with a small tip. (Alternatively, use a plastic squeezy sauce bottle with a small tip, or a sandwich bag with a small corner cut off)
  3. Outline traced circles on the baking paper and fill in the centres. Then refrigerate until chocolate is hardened.
  4. To make coloured buttons, add food colouring to the melted chocolate and stir well before piping circles.
  5. To make sprinkle buttons, pipe the chocolate onto the paper and cover with sprinkles before placing them into the fridge.
  6. Once the buttons are hardened, carefully remove them from the paper and place them onto the cake. If you would like them raised like the ones below, start at the back of the cake and place a few of the buttons on an angle. Hold them in place by putting a mini marshmallow or additional chocolate underneath them. Then rest the remaining buttons at the front at the same angle.